Deploying Gitea with Podman and Docker Compose

I’ve been running a self-hosted instances of GitLab for a few months. In general I’m happy with GitLab but it’s fairly resource intenseive for my usage so I decided try Gitea as a lightweight alternative.

This covers setting up Docker Compose to run with rootless Podman on a local machine so HTTPs, security, and other settings are out of scope for this post.

Sources

I used the below sources to install the test instance.

Running Docker Compose with Rootless Podman

Installation with Docker (rootless)

Install and configure Podman and Docker Compose

sudo dnf install -y podman podman-docker docker-compose
systemctl --user enable podman.socket
systemctl --user start podman.socket
systemctl --user status podman.socket
export DOCKER_HOST=unix:///run/user/$UID/podman/podman.sock
echo 'export DOCKER_HOST=unix:///run/user/$UID/podman/podman.sock' >> $HOME/.bash_profile

Configure Gitea docker-compose.yaml

I’m going to deploy with Gitea using MySQL as the backing database. All the volumes will be local volumes so we don’t have to worry about permissions. Make sure you change the example credentials for both MySQL and Gitea.

First create a folder for your compose file and cd into that directory

mkdir -p gitea
cd gitea
touch docker-compose.yaml

Copy the below example docker-compose.yaml into the docker-compose.yaml file.

#docker-compose.yaml
version: "2"

volumes:
  gitea-data:
    driver: local
  gitea-config:
    driver: local
  mysql-data:
    driver: local

services:
  server:
    image: docker.io/gitea/gitea:1.20.1-rootless
    environment:
      - GITEA__database__DB_TYPE=mysql
      - GITEA__database__HOST=db:3306
      - GITEA__database__NAME=gitea
      - GITEA__database__USER=gitea
      - GITEA__database__PASSWD=gitea
    restart: always
    volumes:
      - gitea-data:/var/lib/gitea
      - gitea-config:/etc/gitea
    ports:
      - "3000:3000"
      - "2222:2222"
    depends_on:
      - db

  db:
    image: docker.io/mysql:8
    restart: always
    environment:
      - MYSQL_ROOT_PASSWORD=gitea
      - MYSQL_USER=gitea
      - MYSQL_PASSWORD=gitea
      - MYSQL_DATABASE=gitea
    volumes:
      - mysql-data:/var/lib/mysql

After you have created the docker-compose.yaml file and modified it to your liking simple run docker-compose up to start the Gitea instance. After a few seconds the instances will be ready to configure. If you’ve kept the default ports in place simply nagivate to http://localhost:3000 to finalize the Gitea installation. You should see a screen similar to the below image.
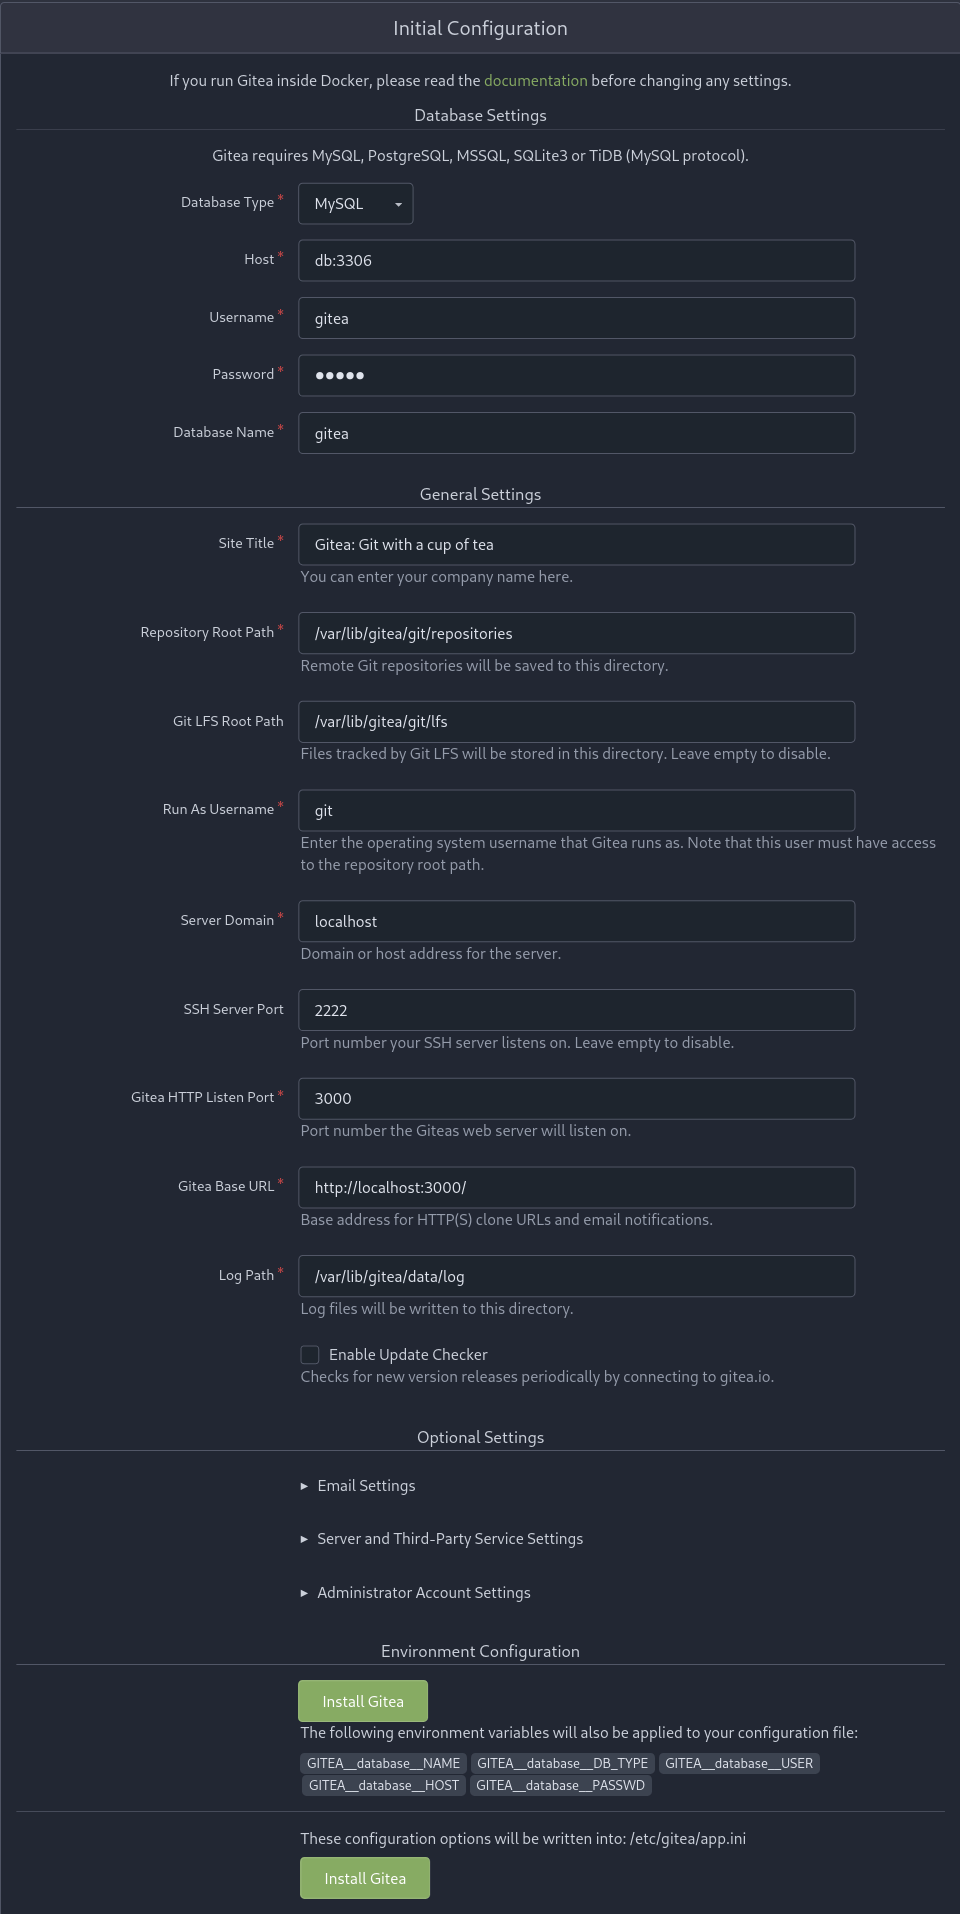
You can accept the defaults or modify the configruations as necessary. Once you are satisfied with the instance you can click one of the two Install Gitea buttons at the bottom of the page.

Once the server has finished the installation process your browser will refresh to the login page.

Click the Need an account? Register now. link and create the first user. This user will be the admin user.

Login as this user to perform any additional server setup and create users.

Tear Down

Once you are finished with the test instances you can shut it down by running

docker-compose down

this will stop the containers but preserve the volumes created in the docker-compose.yaml file. If you want to delete the volumes as well you can either delete them using the podman cli or by running docker-compose down --volumes.

Adding a Process to a cgroup (version 2)

Add the process id to the desired cgroup’s cgroup.procs file.


# create cgroup
sudo mkdir /sys/fs/cgroup/testgroup
# enable cpu interface
echo "+cpu" | sudo tee -a /sys/fs/cgroup/cgroup.subtree_control 
# enable cpuset interface
echo "+cpuset" | sudo tee -a /sys/fs/cgroup/cgroup.subtree_control 
# add current process to cgroup
echo "$$" | sudo tee -a /sys/fs/cgroup/testgroup/cgroup.procs 
Read more →

Building Containers Images with Nerdctl

The basic commands are nearly identical to the commands you would use to build a container with dockerd(moby). The main difference is that unlike dockerd, containers built with nerdctl are not available in Kubernetes by default.

To build a container that is available in Kubernetes you must specify the k8s.io namespace


# -n specifies the k8s.io namespace
nerdctl -n k8s.io build . -f containerfile -t app:0.0.1
# the container is visible inside Kubernetes
kubectl create deployment quick-test --image=app:0.0.1

How to determine available resources in a container

Linux distributes system resources using control groups (cgroup) which the kernel.org defines as

cgroup is a mechanism to organize processes hierarchically and distribute system resources along the hierarchy in a controlled and configurable manner. [1]

There are currently two versions of cgroup in use today and due to historical and compatibility reasons version 1 and version 2 of cgroups can coexist as long as there are no overlaps between which controllers are being managed.

The main, but not only, difference between cgroup version 1 and version 2 is that version 1 has a mount for each controller while version 2 unifies all the active controllers under a single mount point. This is obviously a very simplified explanation. Please see the official kernel documentation for more details on the two versions [2][3].

They typical mount point for both versions of cgroup is /sys/fs/cgroup. This is not a hard requirement and can be different depending on the distro. For instance Alpine Linux with OpenRC in hybrid mode will mount cgroup version 1 at /sys/fs/cgroup and version 2 at /sys/fs/cgroup/unified.

This table will assume that the cgroup root path is /sys/fs/cgroup and will use relative paths based on that. Adjust the relative paths based on your environment.

resource cgroup v1 cgroup v2
available memory ./memory/memory.limit_in_bytes ./memory.max
assigned cpu cores ./cpuset/cpuset.effective_cpus ./cpuset.effective.cpus
cpu bandwidth ./cpu/cpu.cfs_quota_us ./cpu.max
cpu period ./cpu/cpu.cfs_period_us ./cpu.max

Refer to the documentation for the format for each file.

To determine which cgroup your application belongs to you can reference /proc/self/cgroup which will list all the cgroup that your process belongs to. Depending on the environment you may also need to map your cgroup to the actual mount point by inspecting /proc/self/mountinfo. This is especially true if running inside a container where the cgroup may refer to the path on the host and may not be accurate when viewed inside the container.

Asking the Right Question

How many cores are on my system?

This is a seemingly simple question. We’d like to use the number of available processors to determine how many jobs we can safely run in parallel. Linux provides various ways to fetch the number of available processors including:

  • nproc
  • lscpu
  • /proc/cpuinfo

> nproc 
32

> lscpu | grep ^CPU\(s\)\: | awk '{print $2}'
32

> grep --count "processor" /proc/cpuinfo
32
Read more →